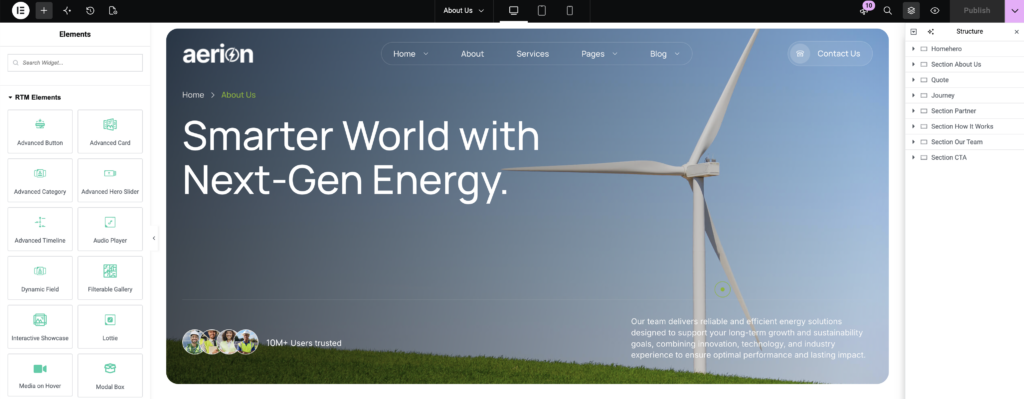
Purchase via Store (RTMHub)
With RTMHub, you can browse and purchase Rometheme themes directly from your WordPress dashboard, without leaving your site. Once your purchase is complete, the theme is ready to install and use right away.
Follow the Step-by-Step Instructions:
With RTMHub, you can purchase themes that fit your needs. Once your purchase is complete, the theme is ready to install and use right away.
Step 1 – Buy a Theme
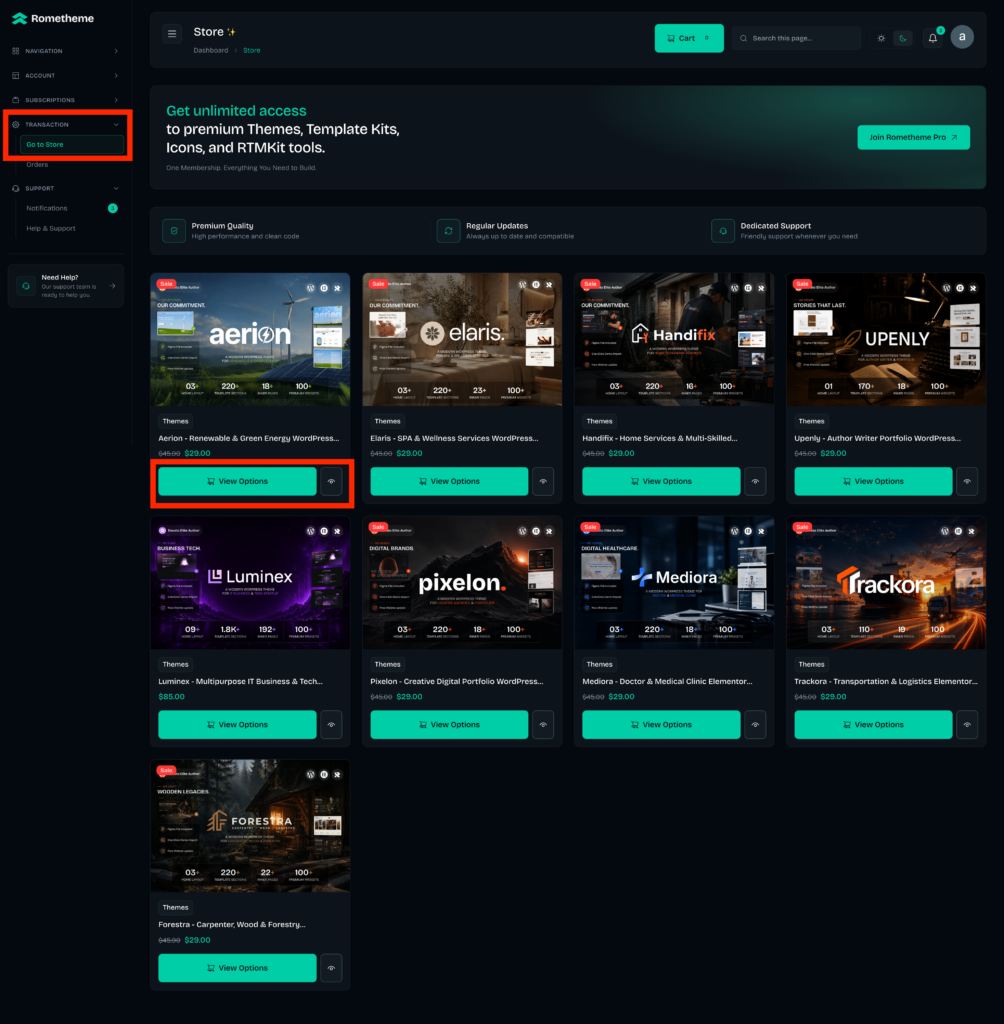
- In the RTMHub dashboard, go to Transaction > Go to Store.
- Browse the available themes and click View Options on the theme you want to purchase.
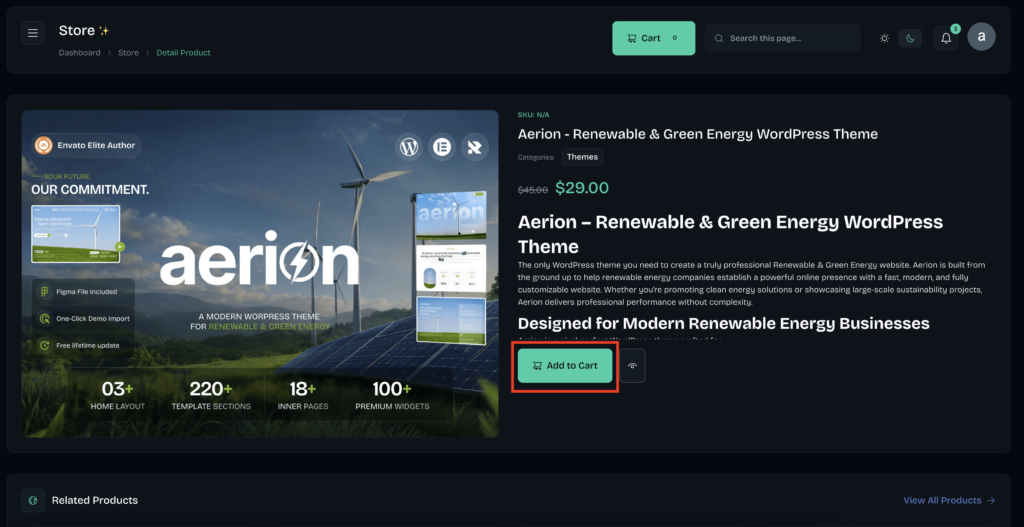
- On the product detail page, review the theme information, then click Add to Cart.
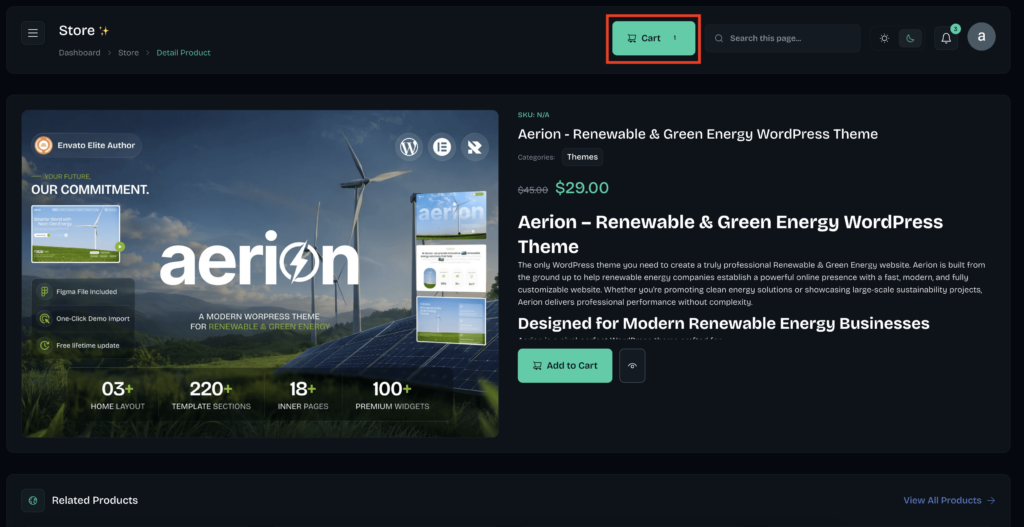
- Once the theme has been added, click Cart at the top of the page to view your order.
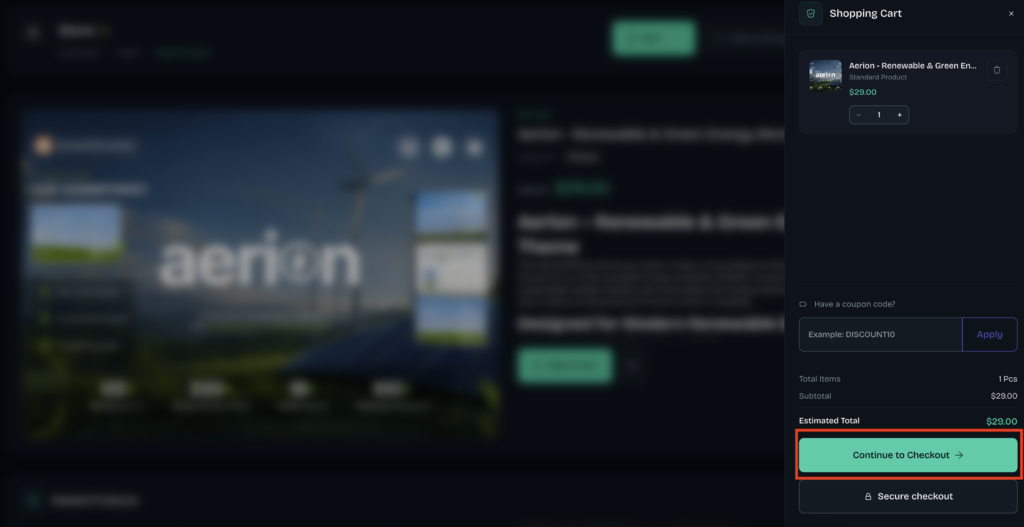
- In the Shopping Cart, check your order.
- Then click Continue to Checkout.
- On the Checkout page, review your Order Summary and tick I agree to the Terms & Conditions.
- Then click Pay with PayPal and complete the payment.
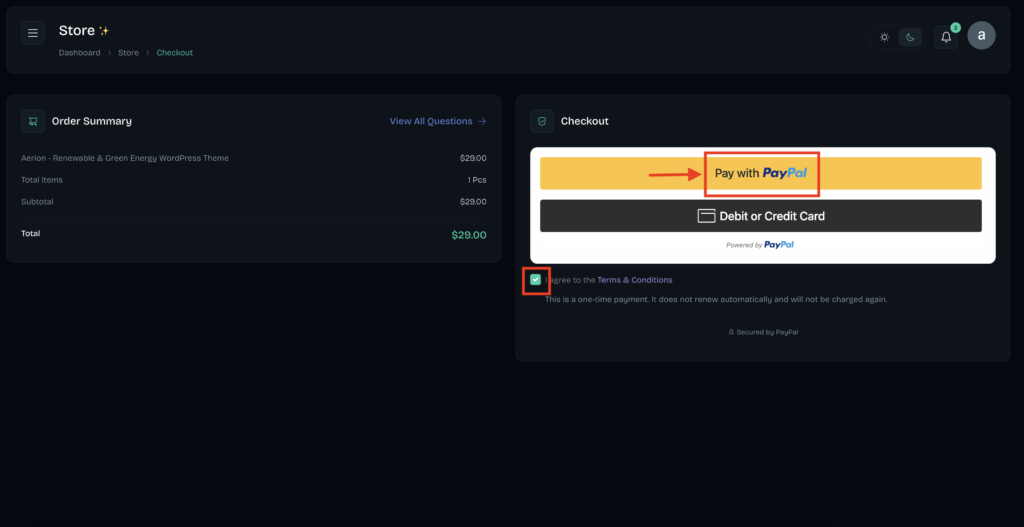
Note: This is a one-time payment. It does not renew automatically, and you will not be charged again.
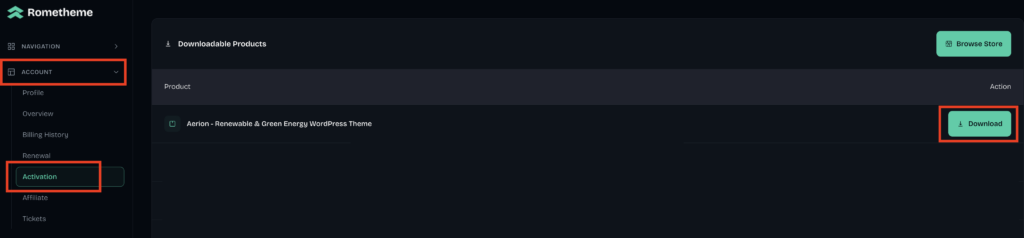
- After your payment is successful, go to Account > Activation. Your purchased theme will appear under Downloadable Products. Click Download to get the theme file.
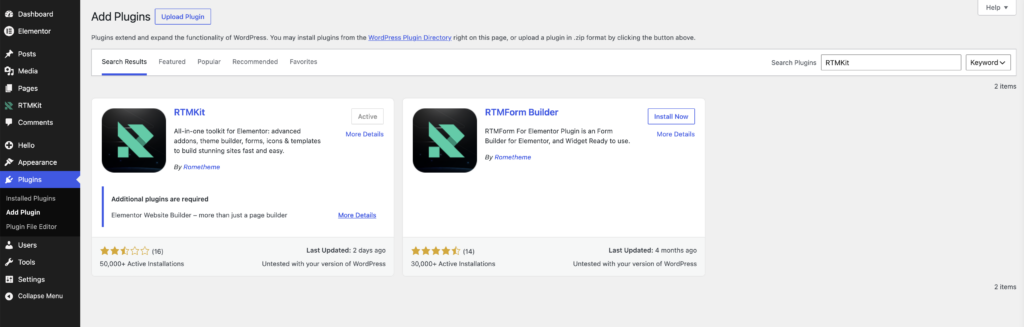
Step 2 — Make sure the RTMKit plugin is installed and activated on your WordPress site.
- If you haven’t installed it yet, install and activate the latest version of RTMKit and RTMForm.
- In your WordPress dashboard, go to Plugins → Add New Plugin, search for RTMKit and RTMForm, then click Install Now and Activate.
Step 3 — Connect your account to RTMHub
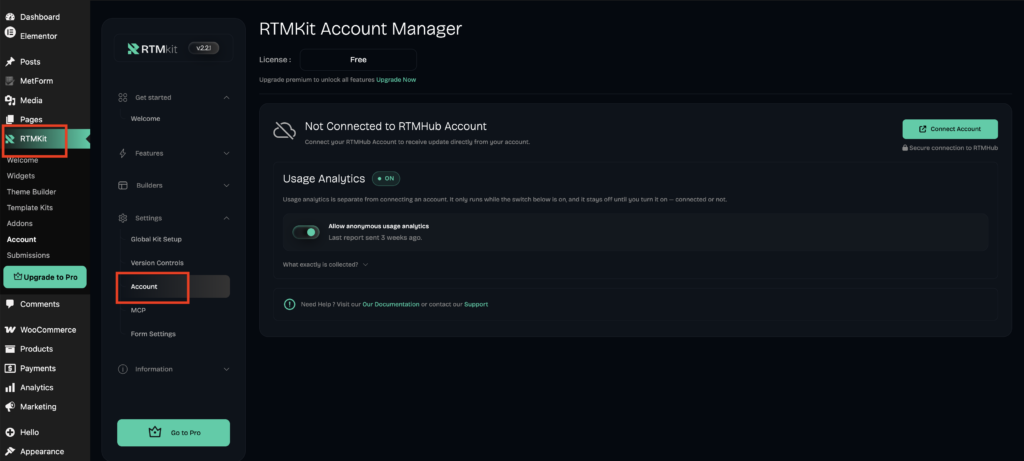
- Go to RTMKit → click Settings → Account.
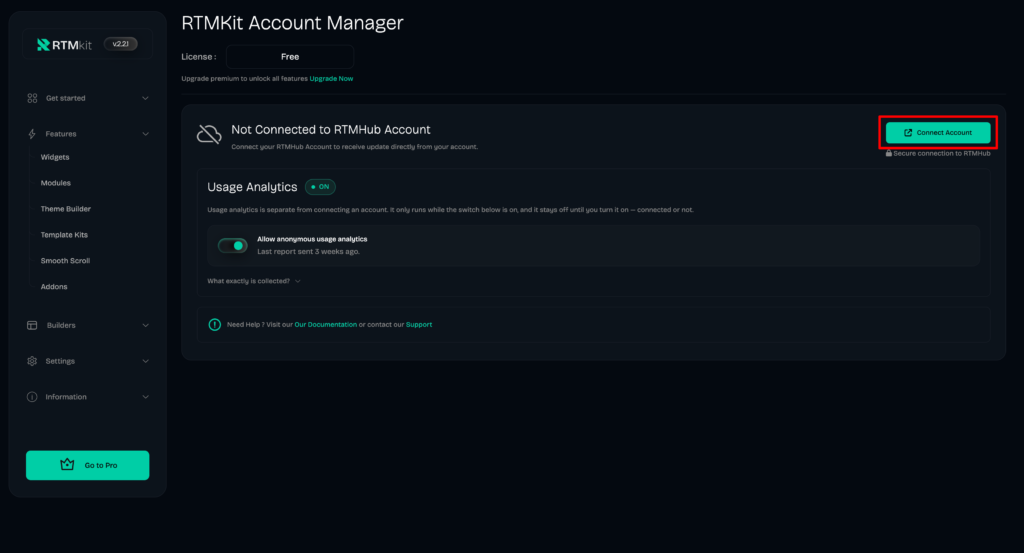
- Click Connect Account.
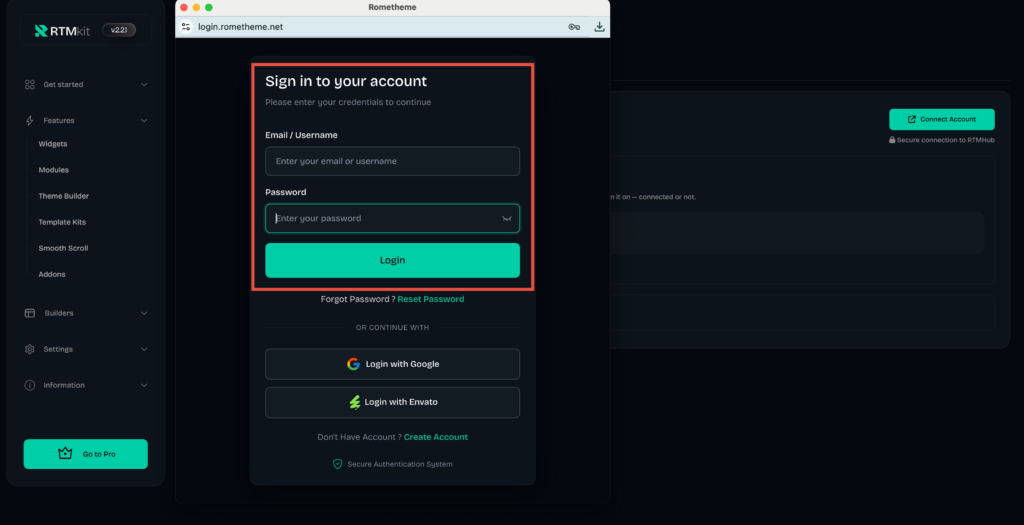
- You will be asked to log in to your RTMHub account.
- Enter your RTMHub account credentials and complete the login process.
- Log in with the same account you used to purchase a Theme.
Step 4 — Confirm the Connection
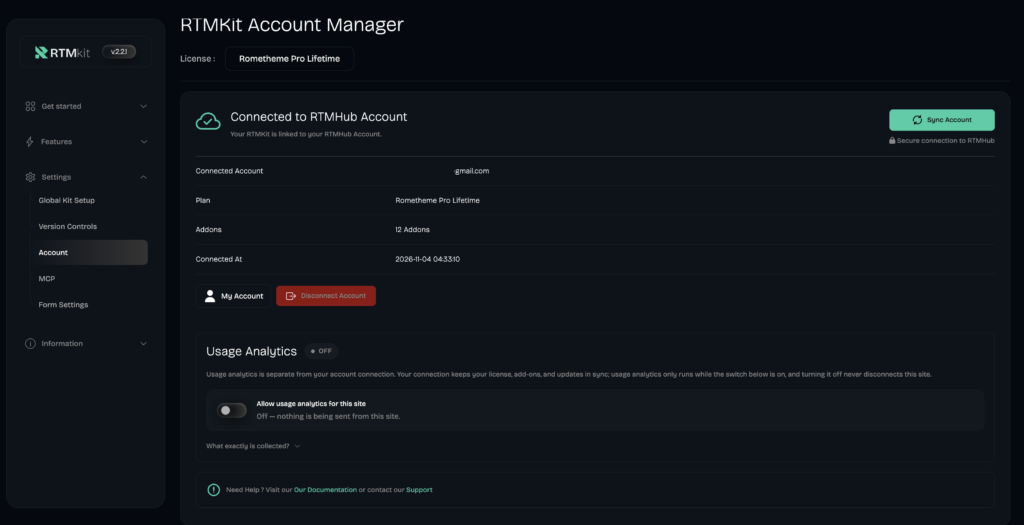
- Once the connection is successful, your RTMHub account will be connected to your website.
- You will see information about your current Plan and the number of active Addons.
Step 5 — Activate the Addons
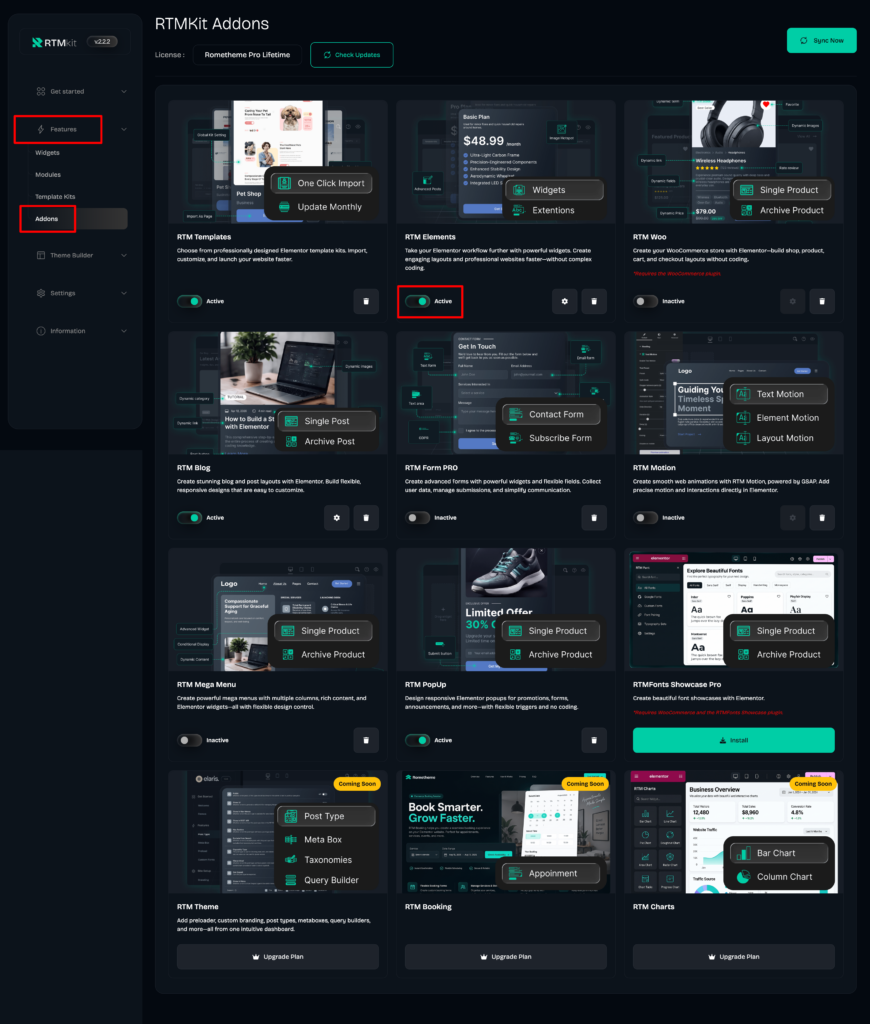
- Once your RTMHub account is connected to your website, you can install and activate the addons to unlock Pro features. Simply install and activate the addons you want to use.
- Important: Make sure to install and activate the RTM Elements addon to use the Pro widgets from RTMKit.
- Follow the steps below to install and activate addons on your website:
- From your RTMHub Dashboard, go to RTMKit → Features → Addons.
- Click Install, then Activate on each addon you want to use.
- Repeat for any other addons you need.
- Once the addon has been successfully installed and activated, it is ready to use.
Step 6 — Install the Theme
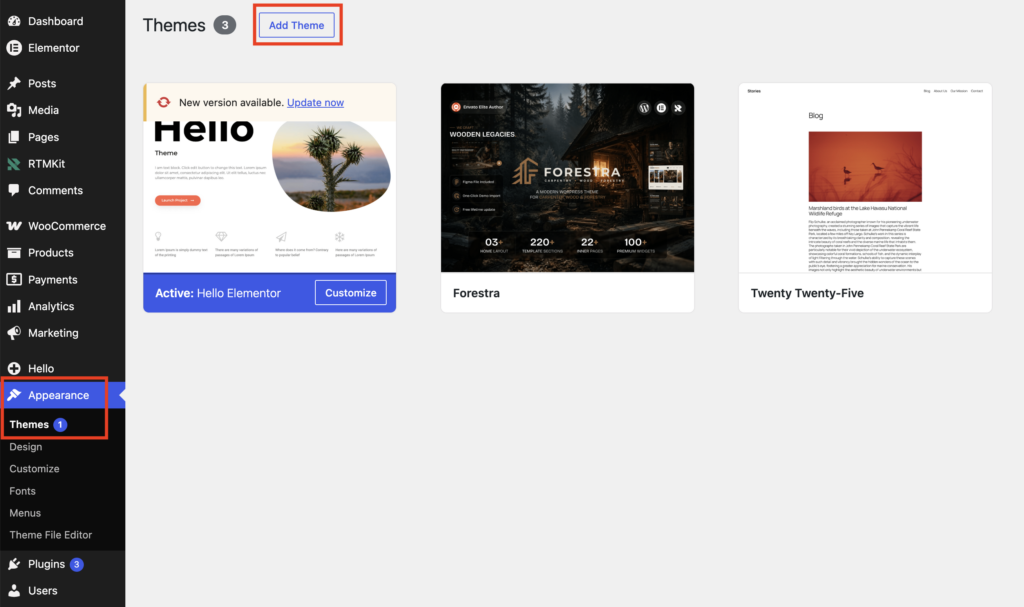
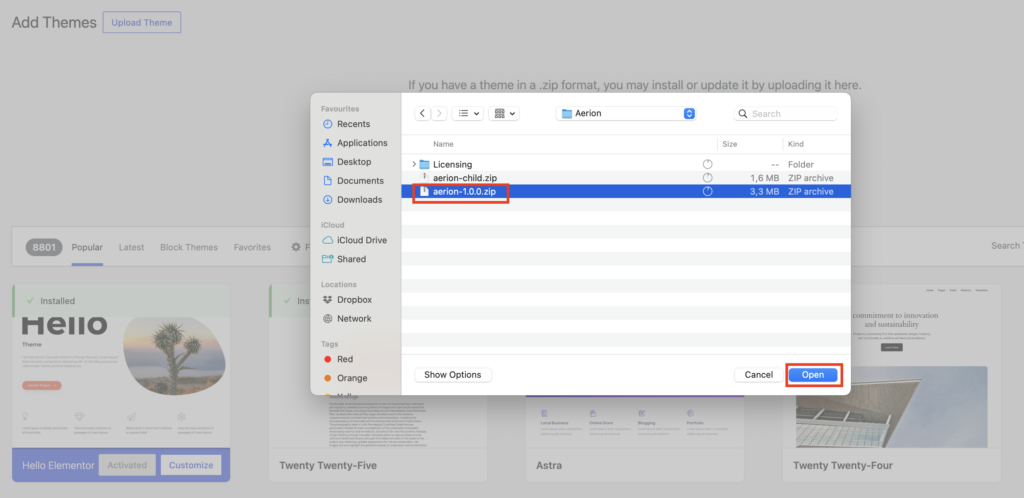
- In your WordPress dashboard, go to Appearance → Themes, then click Add Theme.
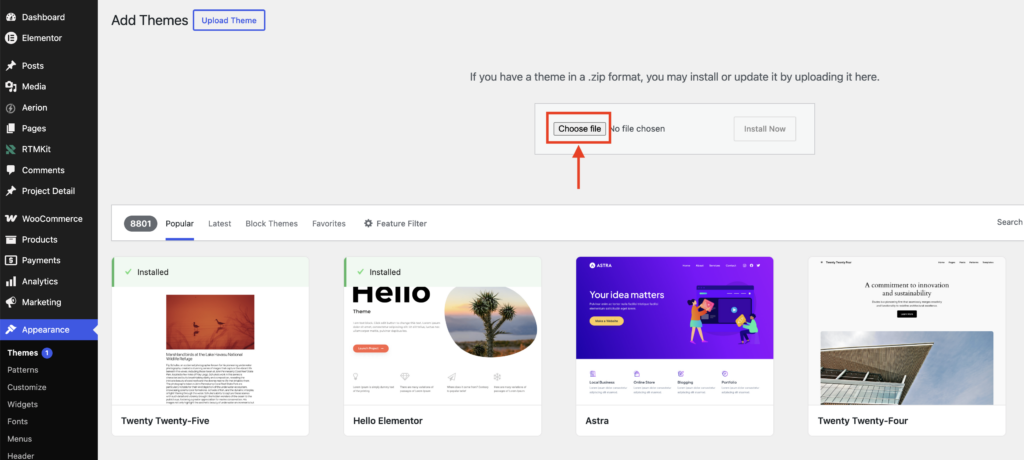
- Click Upload Theme, then click Choose File.
- Extract (unzip) the file you downloaded, then open the theme folder (for example, Aerion).
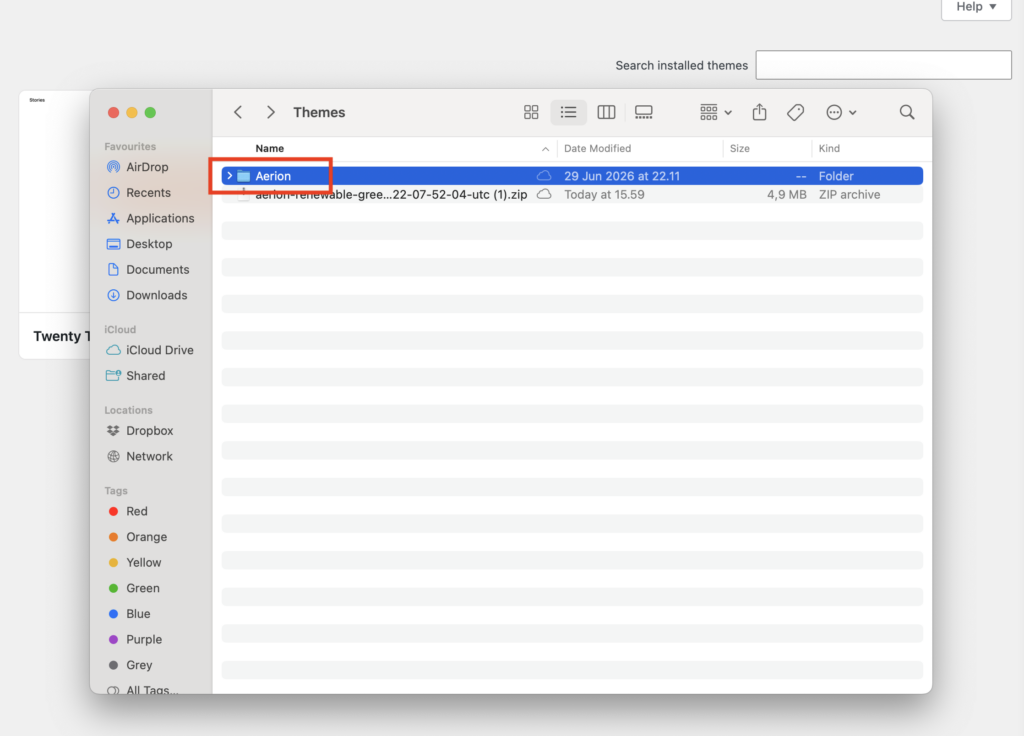
- And select the theme file you want to install: aerion-1.0.0.zip for the main theme, or aerion-child.zip for the child theme.
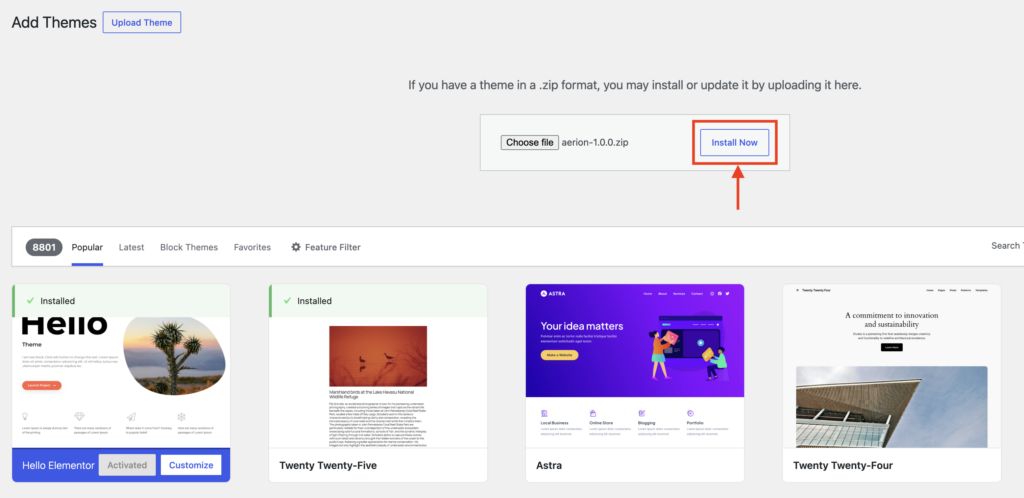
- Click Install Now.
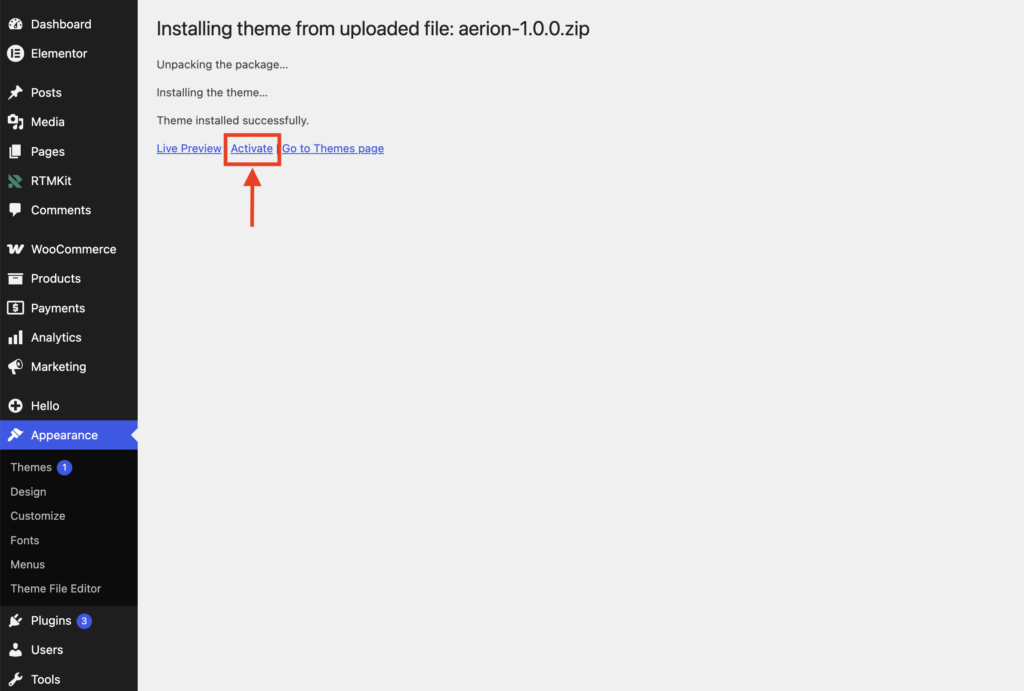
- Then click Activate once the installation is complete.
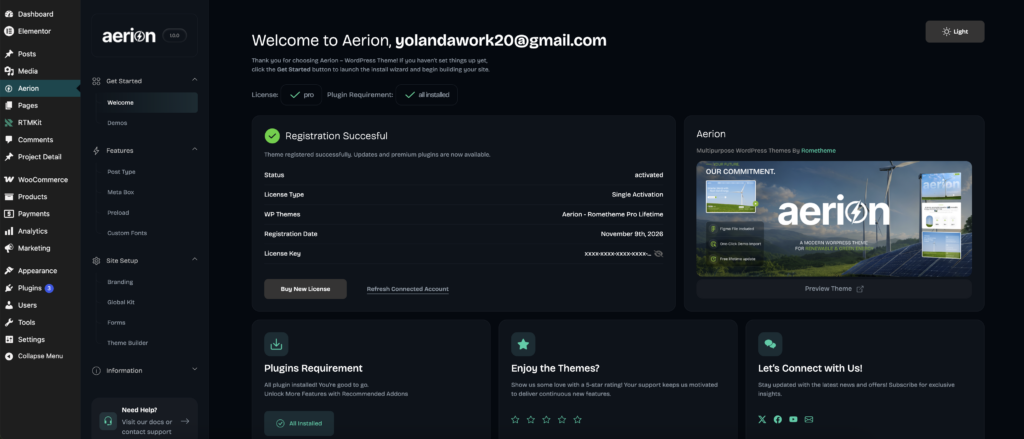
- After activation, the theme’s Welcome page will appear, showing your license status and registration details.
Step 7 — Import the Demo
- Your Pro features are now active, and you can continue with the demo import.
- In your WordPress dashboard, open your theme’s dashboard and go to Get Started → Demos → Click Import Now.
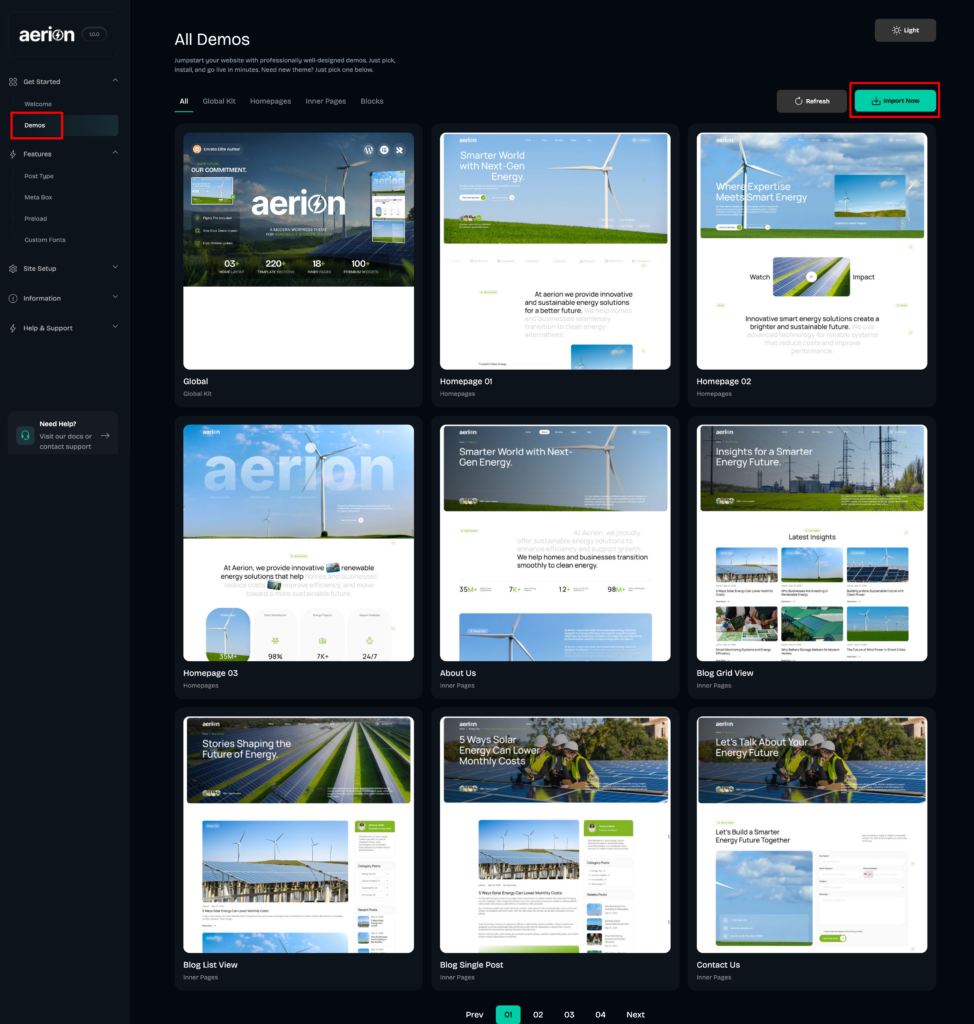
- Under Import Type, choose one of these options:
- Full import all: imports all demo content, pages, and global styles.
- Demo Content Only: imports the pages and content without the global styles.
- Global Style Only: imports only the global styles, such as colors and typography.
- Keep Import Attachments turned on if you want the demo images and media included.
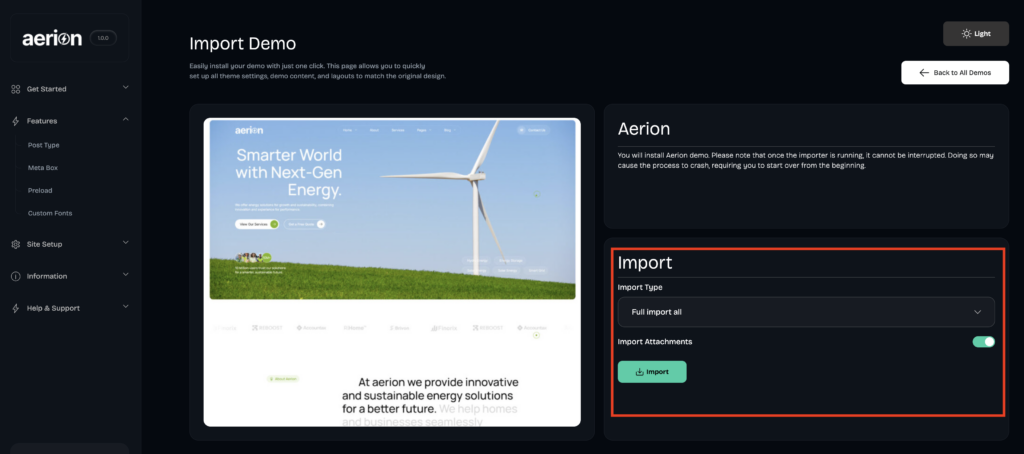
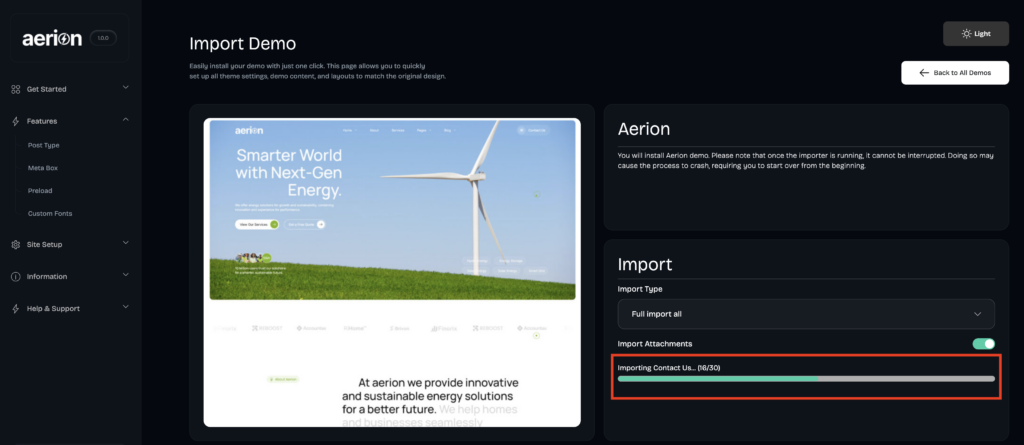
- Click Import and wait until the progress bar finishes.
Step 8 — Edit your pages with Elementor
After the import, all demo pages are ready to customize.
- In your WordPress dashboard, go to Pages → All Pages.
- Click Edit with Elementor.
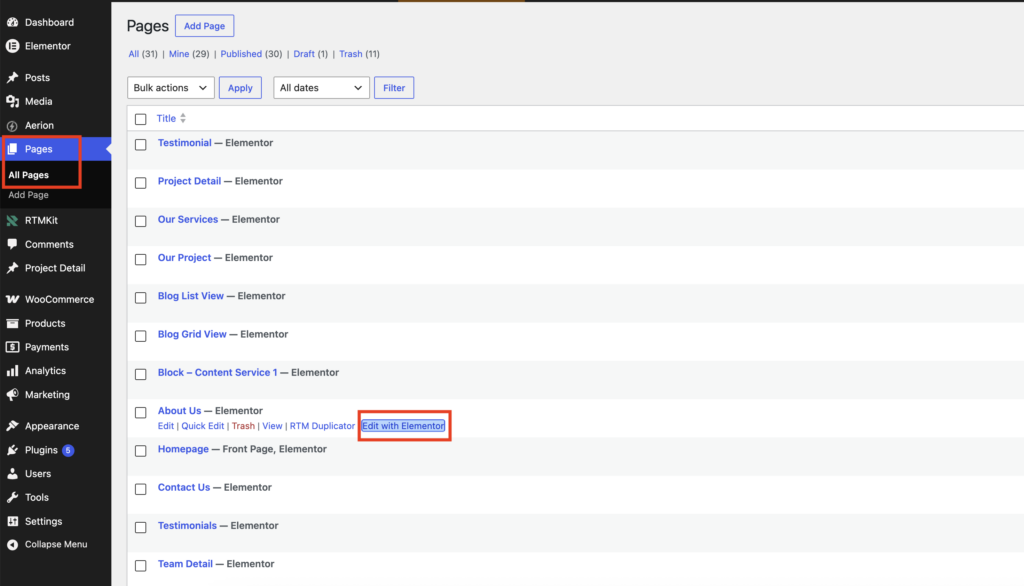
- You can now customize the content, images, and layout, including the Pro widgets that are now unlocked.