Get the Pro Plan to Unlock All Pro Features
If you downloaded a Rometheme theme from Envato Elements, you can use the theme itself, but its Pro features are not included.
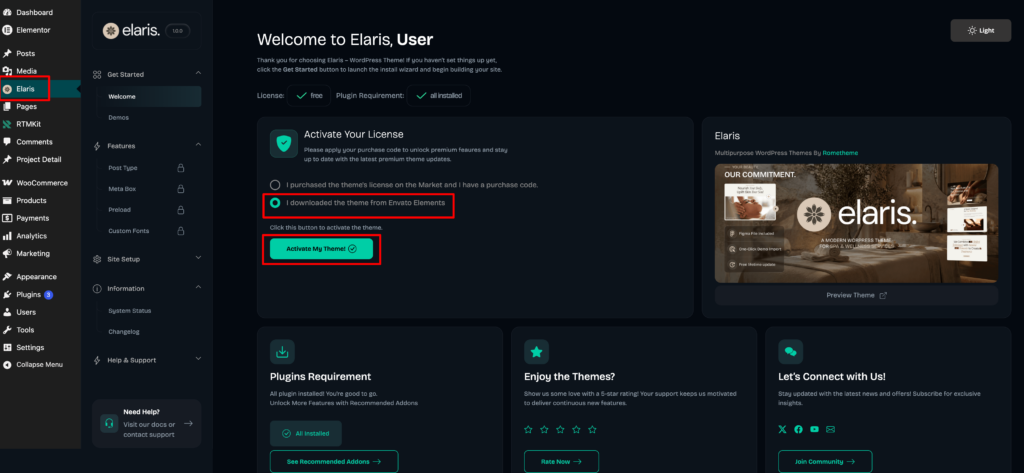
To unlock them, purchase a Pro Plan from the Rometheme Store, then complete the three steps below.
This guide is for anyone who got a Rometheme theme through an Envato Elements subscription and wants access to the Pro Feature
Before you start: Purchase a Pro Plan
- Go to the Rometheme Store pricing page at https://store.rometheme.net/pricing, choose the plan that fits your needs, and complete checkout.
- Keep the email and password you used for this purchase. You will need them to connect your site to RTMHub in the next step.
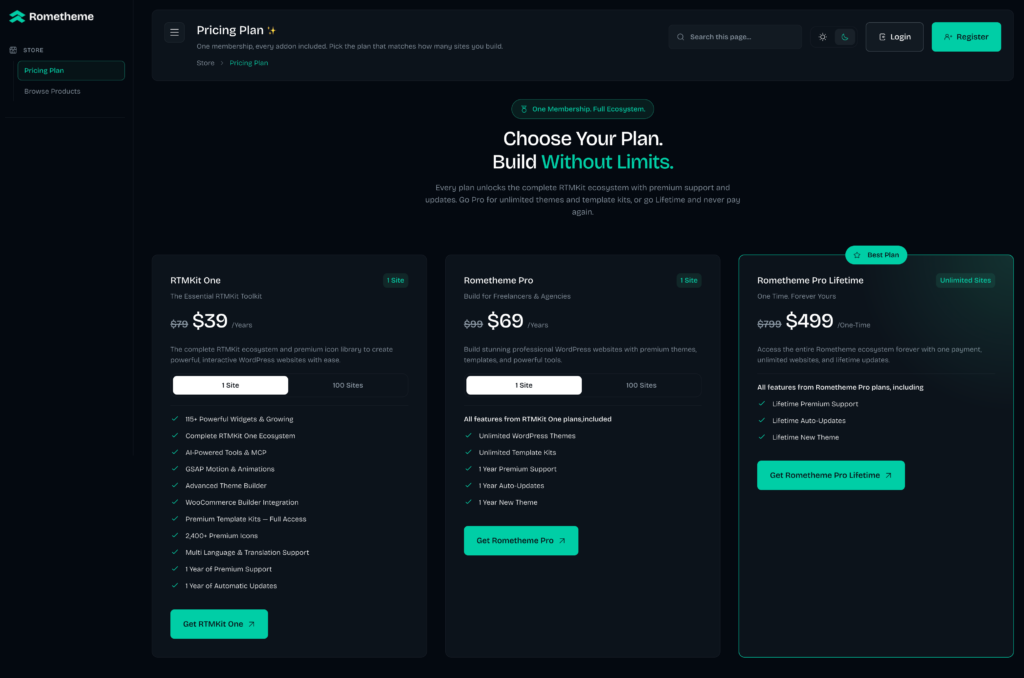
Step 1 — Make sure you have installed and activated the RTMKit plugin.
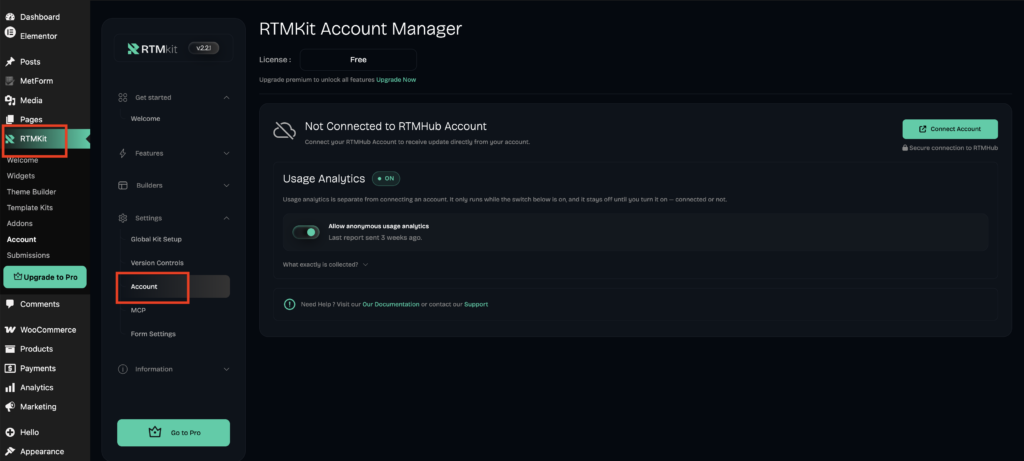
- Go to the RTMKit menu in your WordPress dashboard.
- If you haven’t installed and activated the RTMKit plugin yet, you can install and activate the latest version. Go to Plugins → Add Plugin → Search RTMKit → Click Install and Activate.
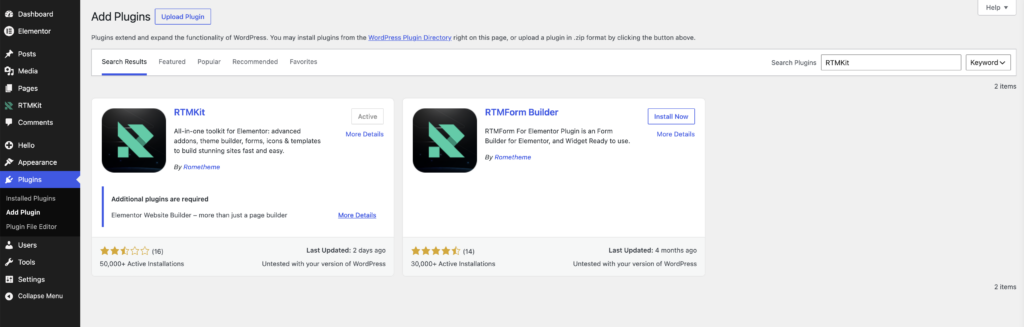
Step 2 — Connect your account to RTMHub
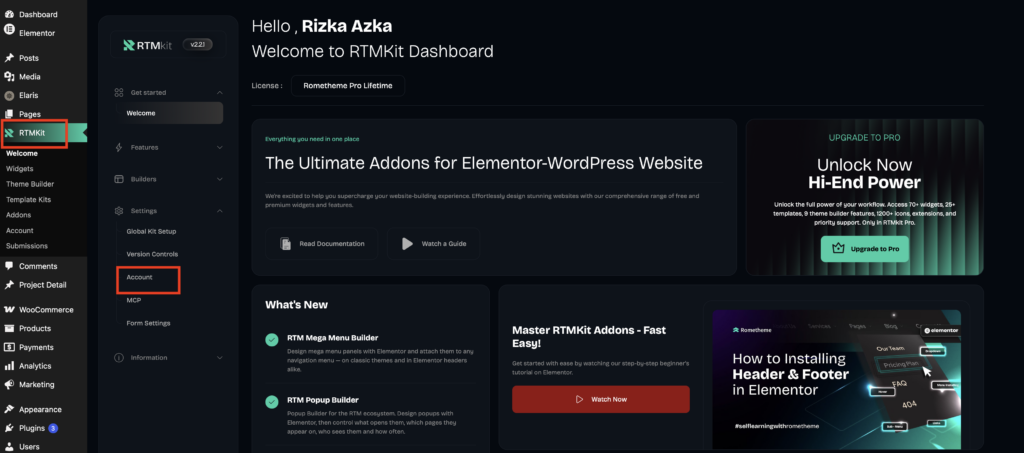
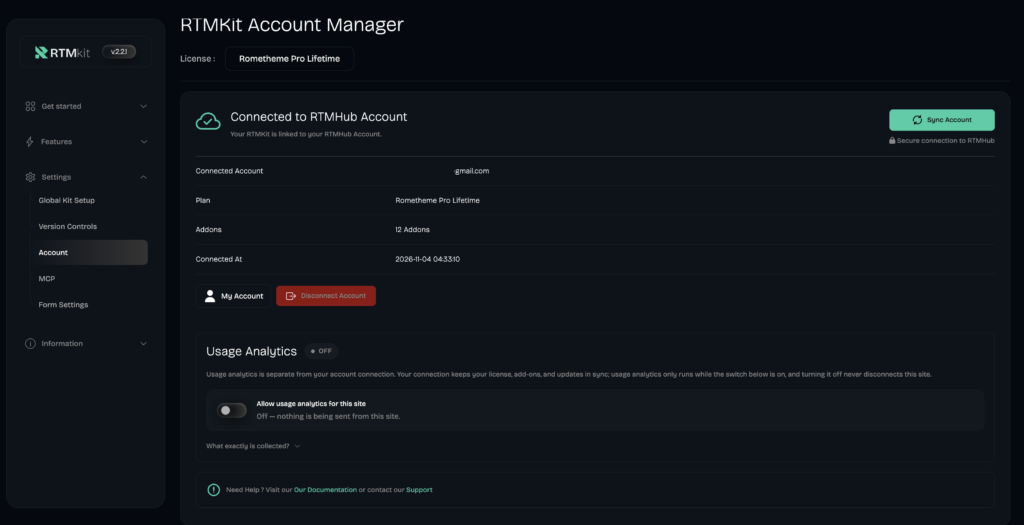
- Go to RTMKit → click Settings → Account.
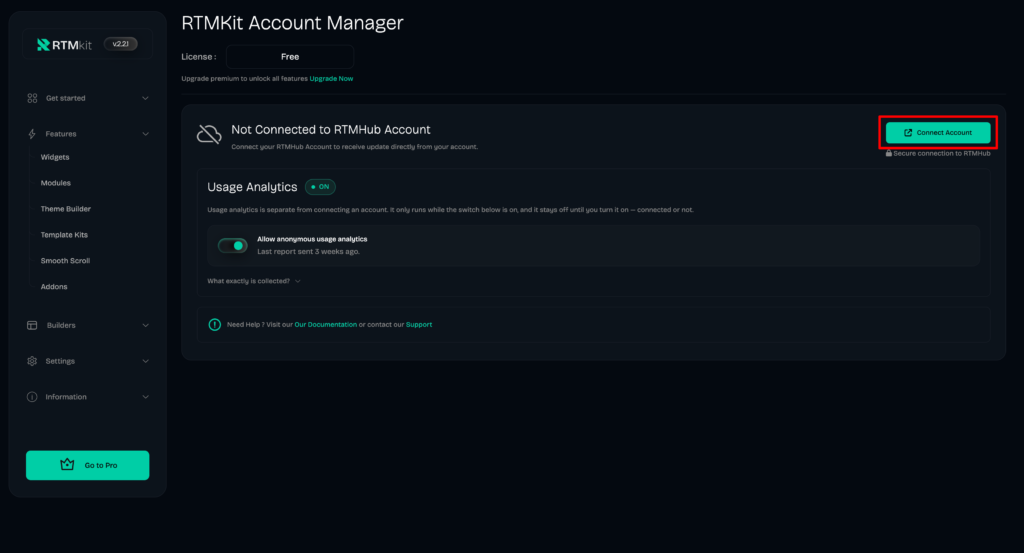
- Click Connect Account.
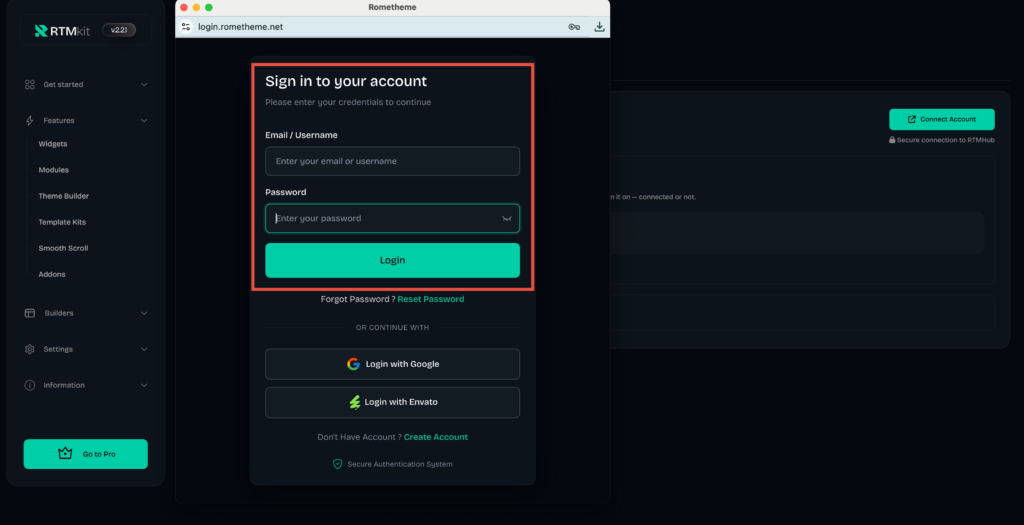
- You will be asked to log in to your RTMHub account.
- Enter your RTMHub account credentials and complete the login process.
- Log in with the same account you used to purchase your Pro Plan.
Step 2 — Confirm the Connection
- Once the connection is successful, your RTMHub account will be connected to your website.
- You will see information about your current Plan and the number of active Addons.
Step 3 — Activate the Addons
- After successfully connecting your RTMHub account to your website, you can install and activate the addons included in your plan.
- Follow the steps below to install and activate the addons you need on your website:
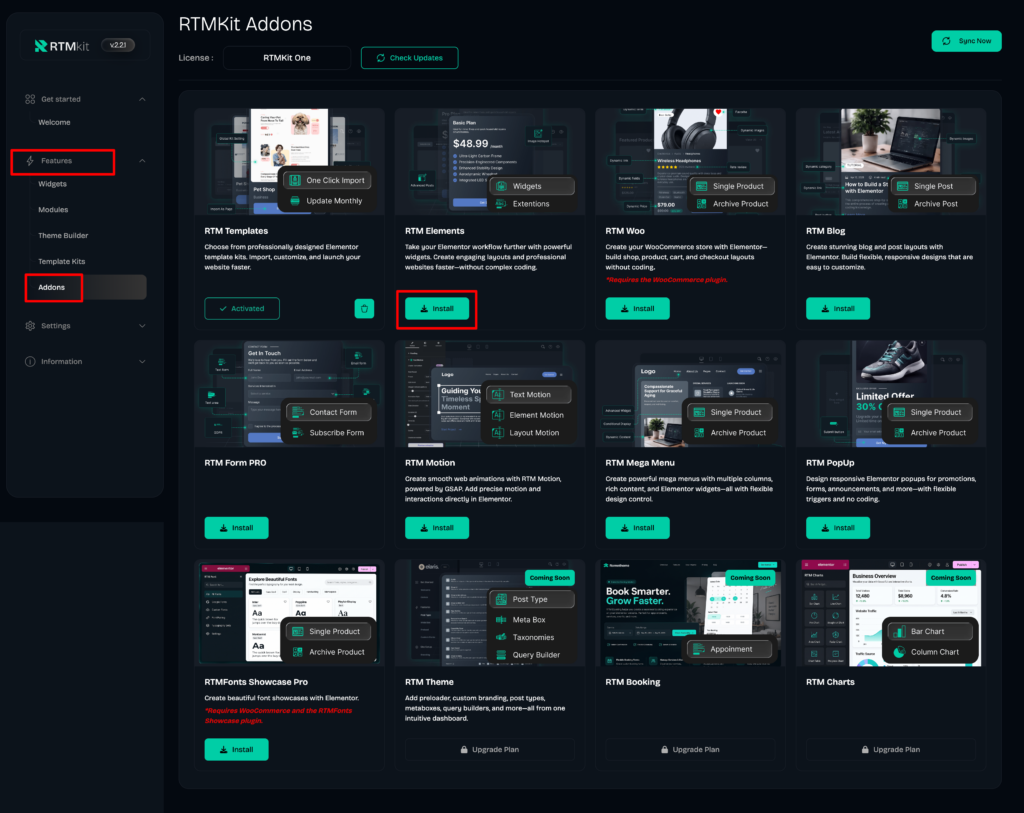
- From your RTMHub Dashboard, go to RTMKit → Features → Addons.
- You can click Install and Activate all available addons one by one.
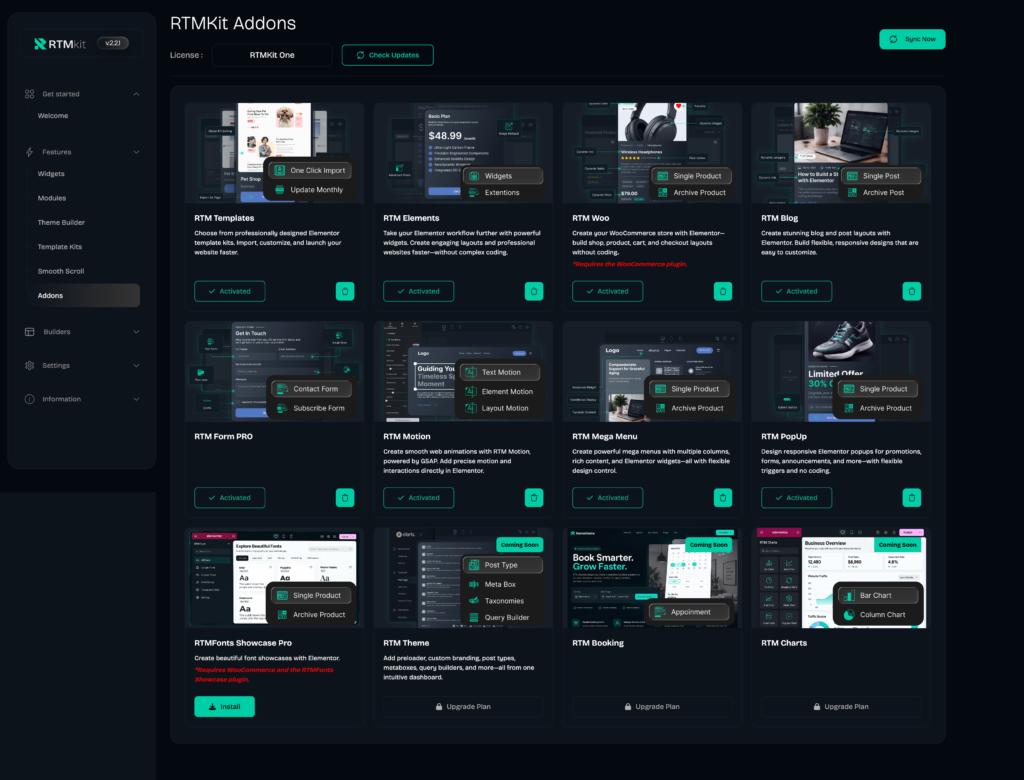
- Once the addon has been successfully installed and activated, it is ready to use.
- You can now start using the addon and its available features to customize and enhance your website according to your needs.
Step 4 — Import the Demo
- Your Pro features are now active, and you can continue with the demo import.
- In your WordPress dashboard, open your theme’s dashboard and go to Get Started → Demos → Click Import Now.
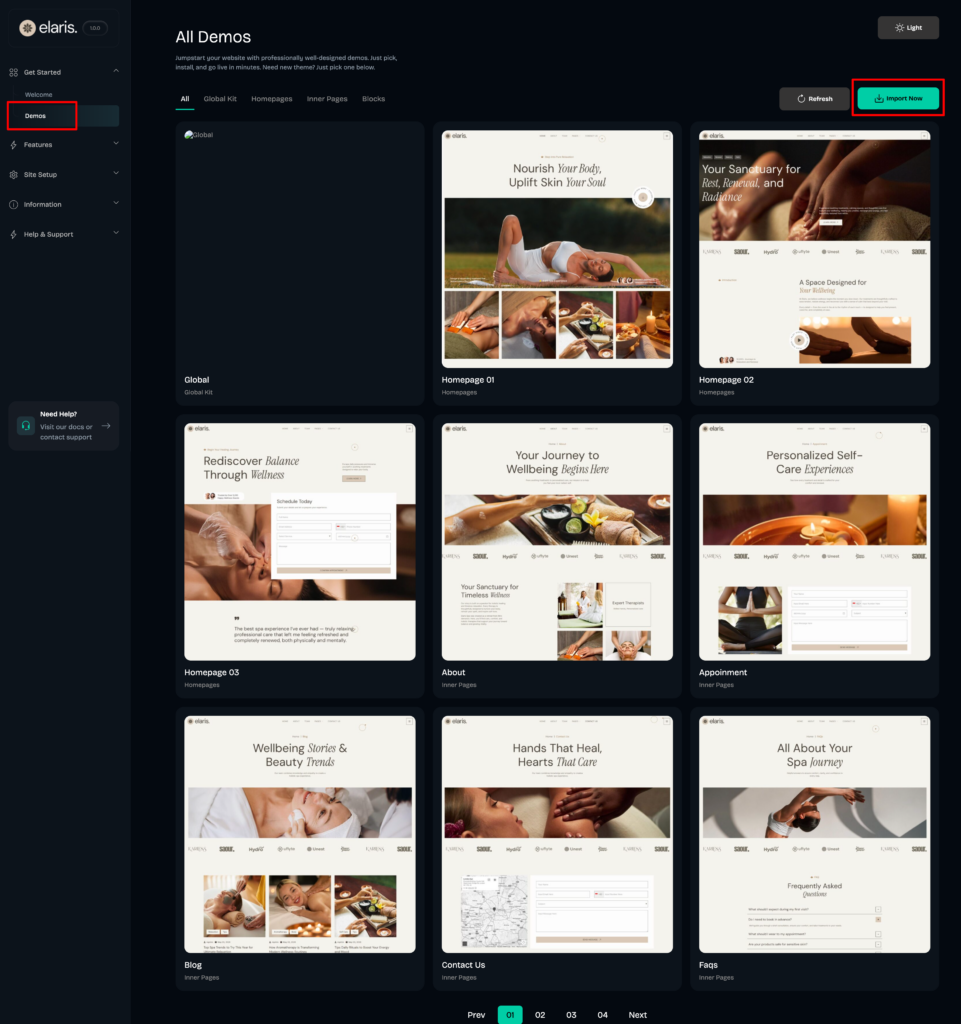
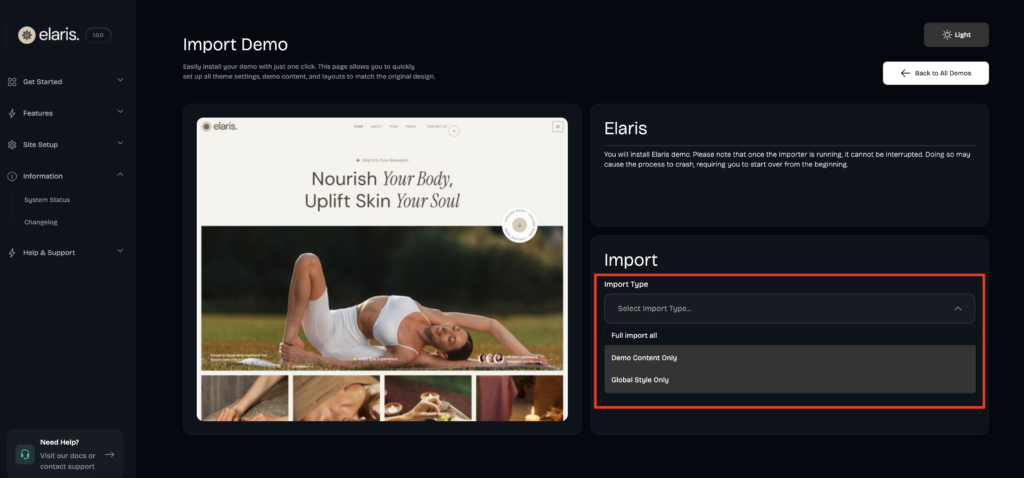
- Under Import Type, choose one of these options:
- Full import all: imports all demo content, pages, and global styles.
- Demo Content Only: imports the pages and content without the global styles.
- Global Style Only: imports only the global styles, such as colors and typography.
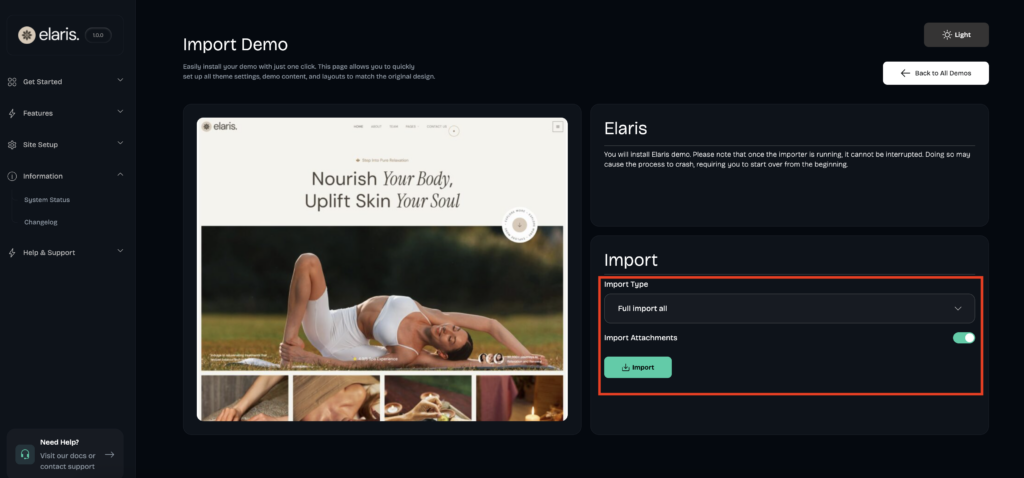
- Keep Import Attachments turned on if you want the demo images and media included.
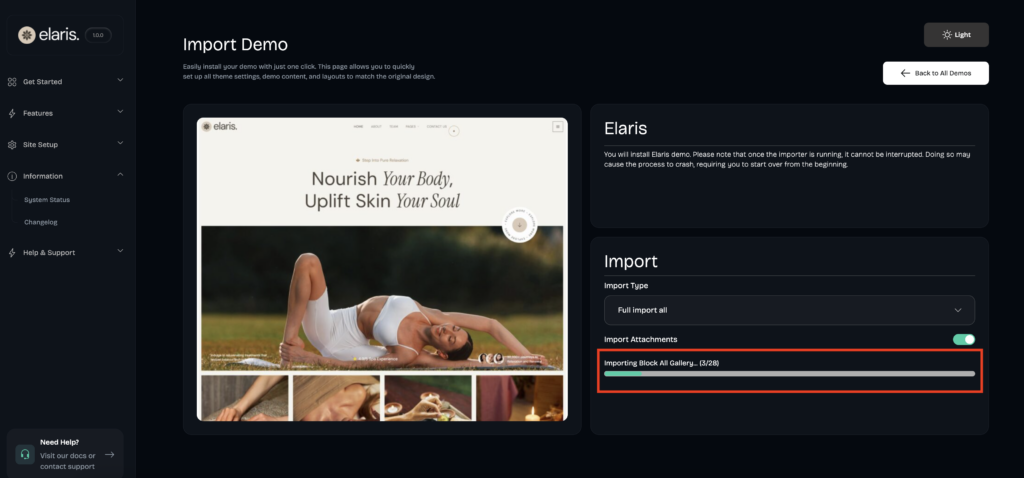
- Click Import and wait until the progress bar finishes.
Step 5 — Edit your pages with Elementor
After the import, all demo pages are ready to customize.
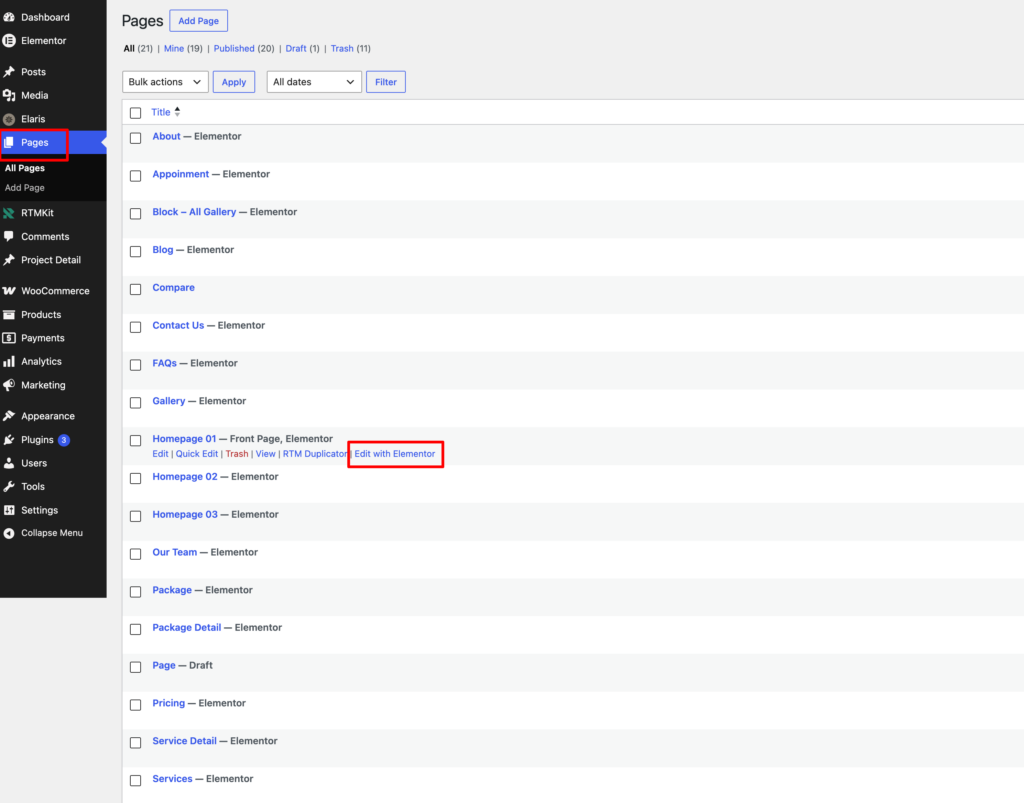
- In your WordPress dashboard, go to Pages → All Pages.
- Hover over the page you want to edit, such as Homepage 01.
- Click Edit with Elementor.
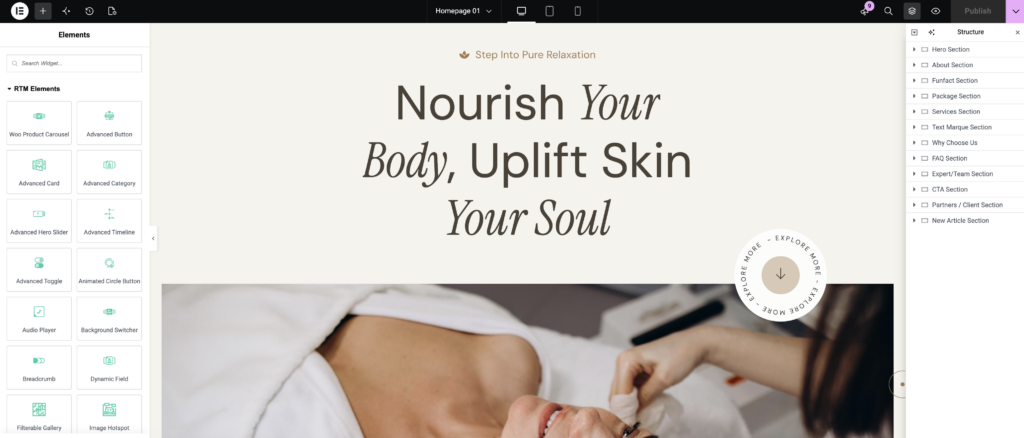
You can now customize the content, images, and layout, including the Pro widgets that are now unlocked.